Are you curious to know about can you use two projectors for one screen? Yes, you can do it in just few steps. But can this innovative approach truly deliver on its promises of improved brightness, resolution, and overall visual impact?
It’s essential to remember that implementing a dual-projector configuration requires meticulous planning, precise alignment, and suitable hardware. Proper calibration and regular maintenance are crucial to ensure a seamless and synchronized display. Moreover, the practicality of such setups largely depends on the specific needs and scale of each application, as well as the budget available.
In this article, we will explore the fascinating world of dual-projector setups, delving into their potential benefits, challenges, and practical applications. By the end, you will have a clearer understanding of whether two projectors can indeed harmonize to craft a seamless and awe-inspiring viewing experience.
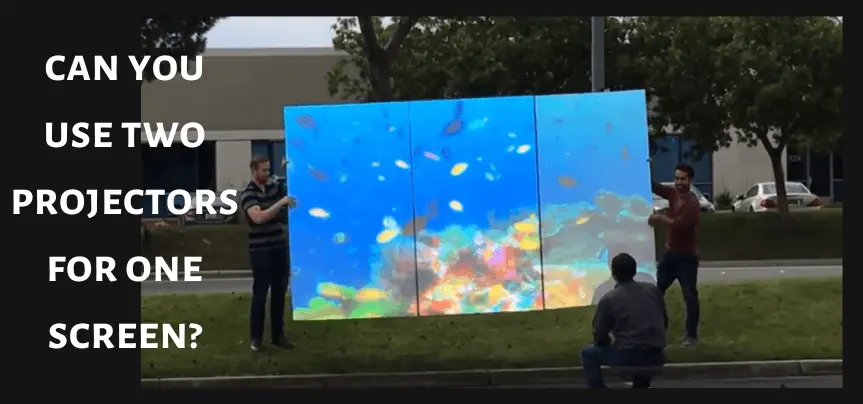
Can You Use Two Projectors For One Screen?
Yes, it is possible to use two projectors for one screen. This setup is commonly known as a dual-projector configuration or a multi-projector display. The main goal of such a setup is to combine the outputs of two projectors to create a larger, more immersive, and higher-resolution image than what a single projector can achieve.
To set up two projectors for one screen, the projectors need to be precisely aligned and calibrated to ensure that they project their images seamlessly onto the screen without any visible gaps or overlaps. This alignment process can be done manually, but there are also specialized software and hardware solutions available to help with the calibration and blending of the projected images.
One of the key benefits of using two projectors for one screen is the ability to increase the brightness of the displayed image. By having two projectors working together, the overall brightness can be significantly improved, making it ideal for large venues or environments with high ambient light.
Dual-projector configurations are commonly used in various applications, such as:
1. Home Theater
Enthusiasts who want to create a more immersive home theater experience may use dual projectors to achieve a larger and more vibrant image.
2. Gaming
Gamers may opt for multi-projector displays to enjoy a wider field of view, particularly in simulators and racing games.
3. Events and Presentations
In large conference halls or events, dual projectors can help ensure that all attendees have a clear view of the presentation content, regardless of their seating position.
4. Simulation and Training
In flight simulators, military training, or virtual reality applications, dual-projector setups can enhance the realism of the simulated environment.
5. Art Installations
Artists and designers may use multi-projector displays to create captivating visual installations and immersive art experiences.
While using two projectors for one screen can offer numerous advantages, there are also challenges to consider. Proper alignment, color matching, and blending of the images require technical expertise and attention to detail. Additionally, the cost of two projectors and the necessary hardware for calibration can be higher than a single projector setup.
Overall, dual-projector configurations can be a powerful tool to create stunning visual experiences, but they require careful planning, setup, and maintenance to achieve the desired results.
Also, click the below articles:
Best Projectors For Classroom
Best Lens Cleaners for Projectors
Best Projectors For Sports
Best Projectors For Wedding Receptions
Best Projectors For Ceiling Mounts
Best Projectors For Projection Mapping
Can you link 2 projectors together?
Yes, it is possible to link two projectors together to create a dual-projector setup. There are several methods to achieve this, depending on the specific requirements and capabilities of the projectors. Here are some common ways to link two projectors:
1. Splitting the Source
If the source device (such as a computer or media player) has multiple video outputs, you can connect each projector to a separate video output. This way, the source device will send different parts of the image or video to each projector, effectively splitting the image between the two projectors.
2. Video Splitter/Processor
A video splitter or video processor can be used to split the video signal from a single source into two or more outputs. This device takes the input signal and duplicates it to send identical signals to each projector. It is an efficient way to display the same content on both projectors simultaneously.
3. Blending Software/Hardware
To create a seamless and unified image across two projectors, you’ll need blending software or hardware. This technology helps to overlap the edges of the projected images from each projector, ensuring that there are no visible gaps or duplications in the final display.
4. Daisy-Chaining (Some Projector Models)
Some modern projectors come with daisy-chaining capabilities, allowing you to connect multiple projectors in series using a single cable. With this feature, you can send the same video signal through each projector successively, which simplifies the setup process.
5. Edge-Blending Projectors (Some Projector Models)
Certain high-end projectors are designed with built-in edge-blending capabilities. These projectors can be configured to automatically overlap their projected images, eliminating the need for external blending hardware or software.
When linking two projectors together, it’s crucial to ensure that both projectors have similar specifications, including resolution, aspect ratio, brightness, and color calibration. This uniformity helps to produce a cohesive and visually pleasing final display.
Dual-projector setups can be used in various applications, such as home theaters, gaming setups, professional presentations, and large-scale events. When setting up dual projectors, proper alignment, calibration, and adjustment are essential to achieve the best results and create a seamless and immersive viewing experience.
What Should Be the Distance Between Two Projectors When Used For One Screen?
The distance between two projectors in a dual-projector setup depends on several factors, including the screen size, the throw ratio of the projectors, the desired image overlap (if using edge blending), and the specific requirements of the projection environment. Achieving the optimal distance between the projectors is crucial to ensure a seamless and properly aligned display on the screen.
Here are some guidelines to consider when determining the distance between two projectors for one screen:
1. Screen Size and Aspect Ratio
The first step is to determine the size and aspect ratio of the screen you are using. The screen size will influence the positioning and alignment of the projectors.
2. Throw Ratio of Projectors
The throw ratio of a projector is the ratio of the projection distance to the screen width. Different projectors have different throw ratios, which affect how far or close the projector needs to be placed to achieve a specific screen size. Consult the projector’s manual or specifications to find the throw ratio.
3. Image Overlap (Edge Blending)
If you plan to use edge blending to create a seamless image across both projectors, you’ll need to position the projectors so that their images overlap on the screen. The amount of overlap required will depend on the blending software or hardware being used.
4. Projection Angle and Keystone Correction
Consider the projection angle of the projectors relative to the screen. Projectors should be set up at a symmetrical angle to the screen to avoid distortion. Keystone correction can be used to correct any trapezoidal distortion caused by the projection angle.
5. Physical Constraints of the Environment
Take into account any physical limitations of the space where the projectors will be installed. This includes walls, pillars, or any obstructions that may affect the positioning of the projectors.
6. Calibration and Alignment
After positioning the projectors, precise calibration and alignment are crucial to ensure that the projected images match perfectly on the screen without any gaps or overlaps.
To get an accurate distance measurement between the projectors, you may use projector calculator tools available online. These tools consider the throw ratio, screen size, and other parameters to suggest the optimal projector placement for your specific setup.
Keep in mind that each dual-projector configuration is unique, so it’s essential to follow the recommendations of the projector manufacturer and, if applicable, the edge blending solution provider. Additionally, seeking the assistance of a professional AV technician or installer can help ensure the best results in setting up the dual-projector system.
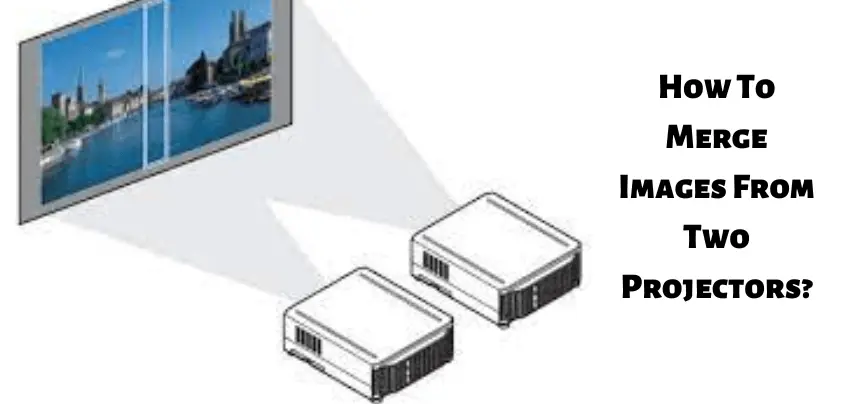
How To Merge Images From Two Projectors?
Merging or blending images from two projectors involves overlapping their projected images onto a single screen to create a seamless and unified display. This process is commonly used in dual-projector setups to achieve higher brightness, resolution, and a larger projected image.
To merge images from two projectors, you’ll need to follow these general steps:
Step 1: Positioning the Projectors
- Set up both projectors at the appropriate distance and angle from the screen. The positioning will depend on factors such as screen size, the throw ratio of the projectors, and the desired overlap area (if using edge blending).
Step 2: Adjusting Image Overlap
- If you are using edge blending to create a continuous image across both projectors, you’ll need to adjust the image overlap. Many modern projectors and edge-blending software solutions come with tools to help you fine-tune this overlap. The goal is to have a smooth transition between the two projected images, eliminating any visible seams or gaps.
Step 3: Calibrating the Projectors
- Proper calibration is essential to ensure that the colors and brightness of both projectors match accurately. Many projectors offer calibration options within their menus. You may also use external calibration tools or software to achieve precise color matching.
Step 4: Image Alignment
- Aligning the images from both projectors is crucial to creating a seamless display. Some projectors have built-in alignment features to help with this process. Alternatively, you can use alignment grids or test patterns to make sure the projected images line up perfectly.
Step 5: Adjusting Keystone and Lens Shift
- Keystone correction and lens shift are features available on many projectors that help correct trapezoidal distortion and adjust the projected image’s position vertically and horizontally. These features may be useful for fine-tuning the alignment.
Step 6: Fine-Tuning Brightness and Contrast
- Ensure that both projectors have consistent brightness and contrast settings. This step is crucial to create a visually uniform image across the entire screen.
Step 7: Test and Adjust
- Once you’ve made the necessary adjustments, carefully test the merged image by displaying various content, such as images, videos, or presentations, to verify that the blending is seamless and that there are no visual artifacts or inconsistencies.
It’s essential to note that the merging process may vary depending on the specific projectors and edge-blending solutions used. Some higher-end projectors come with built-in edge-blending capabilities, which simplifies the process.
For more complex installations, it’s advisable to seek the assistance of a professional audiovisual technician or installer who has experience with dual-projector setups and blending technologies. They can help ensure that the merging process is executed accurately, resulting in a flawless and impressive visual display.
Can You Split An HDMI On a Projector?
Yes, you can split an HDMI signal on a projector using an HDMI splitter. An HDMI splitter is a device that takes one HDMI input and duplicates the signal to multiple HDMI outputs. By connecting the HDMI splitter to your projector’s HDMI input, you can then connect multiple HDMI sources (such as computers, DVD players, gaming consoles, etc.) to the splitter’s input ports. The splitter will replicate the video and audio signals from the input source and send them simultaneously to the projector and other HDMI output devices.
Here’s how you can split an HDMI signal on a projector using an HDMI splitter:
1. Select an HDMI Splitter
Choose an HDMI splitter that fits your requirements in terms of the number of output ports you need and the resolution and refresh rate support (e.g., 4K, 1080p, etc.). Make sure it matches the HDMI version of your devices (e.g., HDMI 1.4, HDMI 2.0, etc.).
2. Power Off All Devices
Before making any connections, power off all the devices involved, including the projector, the HDMI sources (e.g., laptop, DVD player, etc.), and the HDMI splitter.
3. Connect the HDMI Sources
Connect the HDMI output ports of your HDMI sources (e.g., laptops, DVD players, gaming consoles) to the input ports of the HDMI splitter using HDMI cables.
4. Connect the Projector
Connect one of the HDMI output ports of the HDMI splitter to the HDMI input port of your projector using another HDMI cable.
5. Connect Other HDMI Output Devices (Optional)
If you have other HDMI output devices (e.g., TVs, monitors, additional projectors), connect them to the remaining HDMI output ports of the splitter using HDMI cables.
6. Power on the Devices
After making all the connections, power on all the devices, starting with the HDMI sources, followed by the HDMI splitter, and finally, the projector. The HDMI splitter will automatically duplicate the HDMI signal and send it to the connected output devices.
7. Select Input Source
Use your projector’s input/source selection feature to choose the HDMI input connected to the HDMI splitter. The projector will then display the content from the selected HDMI source.
Keep in mind that using an HDMI splitter will replicate the same content on all output devices. If you need different content displayed on different screens simultaneously, you would require an HDMI matrix switch, which allows you to switch and distribute different HDMI sources to multiple displays independently.
Always use high-quality HDMI cables for reliable signal transmission, and ensure that the HDMI splitter is compatible with the devices and resolutions you are using for the best performance.
You may also like the following articles:
Best Projectors For Halloween Effects
Best Projectors For Cookie Decorating
Best Projectors For Camping
Best Projector For Daytime Use
Best Long Throw Projector For Distance
Best Short Throw Projector For Golf Simulator
Best 1080p Projectors Under 500 Dollars
Does Stacking Projectors Increase Brightness?
Yes, stacking projectors can increase brightness, especially in dual- or multi-projector setups. Stacking projectors involves placing multiple projectors on top of each other and projecting their images onto the same screen. This technique is commonly used to achieve higher brightness levels in large venues, outdoor events, or environments with high ambient light.
When projectors are stacked, their combined brightness contributes to the overall illumination of the projected image. The brightness increase is not linear, meaning that two projectors stacked together won’t double the brightness but will provide a significant improvement.
The brightness increase from stacked projectors is especially beneficial when projecting onto larger screens or in situations where a single projector’s brightness might not be sufficient. The additional brightness helps combat the washout effect caused by ambient light, ensuring that the projected content remains vivid and easily visible to the audience.
It’s important to note that stacking projectors requires precise alignment and calibration to ensure that the projected images match perfectly and that there are no visible seams or overlaps. Specialized edge-blending software or hardware may also be used to create a seamless and uniform display.
Additionally, stacking projectors increases the overall cost and complexity of the setup, as it involves purchasing multiple projectors and ensuring proper maintenance for all the units. Nevertheless, when executed correctly, the stacking technique can significantly enhance the visual impact and overall viewing experience, making it a popular choice for large-scale events and installations.
Does a Projector Have To Be In The Middle Of The Screen?
No, a projector does not have to be in the middle of the screen. The placement of the projector depends on several factors, including the projector’s throw ratio, the size and aspect ratio of the screen, the room’s layout, and the desired projection angle.
Here are some common projector placement options:
1. Ceiling Mounting (Centered)
Ceiling mounting the projector in the middle of the screen is a popular choice, especially in commercial installations like classrooms, conference rooms, and home theaters. It provides a symmetrical setup and ensures that the projected image is centered on the screen.
2. Ceiling Mounting (Offset)
In some cases, the projector may be ceiling-mounted but slightly offset from the center of the screen. This can be necessary due to room constraints or when you want to avoid obstructions in the ceiling, such as light fixtures or vents. In such situations, keystone correction or lens shift features can help adjust the projected image to the screen.
3. Tabletop Placement
Projectors can also be placed on a table or a shelf in front of the screen. This setup is common in small meeting rooms or temporary setups. To avoid keystone distortion, the projector should be positioned at a level angle with the center of the screen.
4. Rear Projection
In rear projection setups, the projector is placed behind the screen, projecting the image through a translucent screen material. This arrangement is often used in home theaters or for large-scale rear projection displays at events.
5. Floor Projection (Upward Angle)
In some unique installations, projectors may be placed on the floor, projecting upward onto a screen positioned at a higher level, such as on a stage or a large display area.
When placing the projector, it’s essential to consider factors such as the distance between the projector and the screen, the projector’s height or tilt angle, the room’s dimensions, and any possible obstacles that could interfere with the projection.
Regardless of the projector placement option chosen, it’s crucial to ensure that the projector is properly aligned and calibrated to provide a clear and undistorted image on the screen. Keystone correction and lens shift features, if available, can help adjust the projected image if the projector is not placed perfectly perpendicular to the screen. However, it’s best to aim for the most optimal placement to minimize the need for excessive adjustments and ensure the best possible image quality.
Check these article also for more interesting information:
Best Mini Projector For Netflix
Best Mini Projector For MacBook Air
Best Projector For Dorm Room
Best Cheap Projector For PowerPoint Presentations
Best Projector For a Bright Room
Best Projector Under $200
Best Projector Under $300
Best Projectors Under $50
FAQs
What are blending projectors?
Blending projectors, also known as edge blending, is a technique used in multi-projector setups to create a seamless and continuous image across multiple projector screens. This method is commonly employed in large-scale installations, such as immersive visual displays in theaters, museums, events, and simulations.
The blending process involves overlapping the projected images from adjacent projectors so that they seamlessly blend together without any visible edges or gaps.
How do you edge blend projectors?
Edge blending projectors involves merging the projected images from multiple projectors to create a seamless and continuous display.
To achieve successful edge blending, you’ll need the following steps and considerations:
1. Calibrate and Position the Projectors
2. Overlap the Projected Images
3. Choose the Right Edge Blending Solution
4. Configure the Edge Blending Software/Hardware
5. Calibrate the Projector Colors and Brightness
6. Align the Projected Images
7. Blend and Soften the Overlapping Regions
8. Test and Fine-Tune
9. Save and Store Presets
What is a dual projector screen?
A dual projector screen, also known as a dual-sided projection screen, is a specialized type of projection surface that allows two projectors to project images on both sides of the screen simultaneously. This means that different content or the same content can be displayed on each side of the screen at the same time, catering to audiences on both sides of the screen.
Dual projector screens are typically made from a semi-translucent material that allows light to pass through, making it possible to project images on both sides.
How to connect 2 projectors with 1 laptop?
To connect two projectors to one laptop, you will need to use a combination of hardware and software solutions.
1. Hardware Setup
2. Check Laptop Ports
3. Identify Projector Inputs
4. Connect the First Projector
5. Connect the Second Projector
6. Software Setup
7. Display Settings on Laptop
8. Detect and Identify Projectors
9. Arrange Displays
10. Adjust Resolution and Orientation
11. Test the Setup
12. Fine-Tune Settings
Can you connect multiple projectors?
Yes, you can connect multiple projectors to achieve a multi-projector setup. Connecting multiple projectors can be done for various purposes, such as creating a larger projected image, increasing brightness, or enabling simultaneous displays in different directions.
Here are some common methods:
1. Splitting the Source
2. Using an HDMI Splitter or Distribution Amplifier
3. Daisy-chaining (Some Projector Models
4. Using a Video Processor or Switcher
5. Soft Edge Blending (for Overlapping Projection)
Conclusion
In conclusion, the utilization of two projectors for a single screen has undoubtedly opened up new vistas of possibilities in the realm of audiovisual technology. While the concept of dual-projector setups might seem complex and challenging at first, the rewards they offer in terms of enhanced brightness, resolution, and overall visual impact are undeniable.
So, while two projectors for one screen are not yet ubiquitous, they hold immense promise for reshaping the way we experience visuals in the future. As the pursuit of cutting-edge audiovisual experiences persists, dual-projector setups will undoubtedly remain an exciting area to watch for tech enthusiasts and professionals alike.

