What if you find yourself in a situation where you don’t have access to a traditional projector screen? Is there a cost-effective alternative that can deliver a satisfactory viewing experience without breaking the bank? Enter the intriguing possibility of can I use a roller blind as a projector screen.
In this article, we delve into the curious world of do-it-yourself (DIY) projection solutions and explore whether a humble roller blind can stand in as a viable substitute for a dedicated projector screen.
We’ll examine the considerations, advantages, and limitations of this unconventional approach, offering insights that could help you make an informed decision when faced with the question: “Can I use a roller blind as a projector screen?”
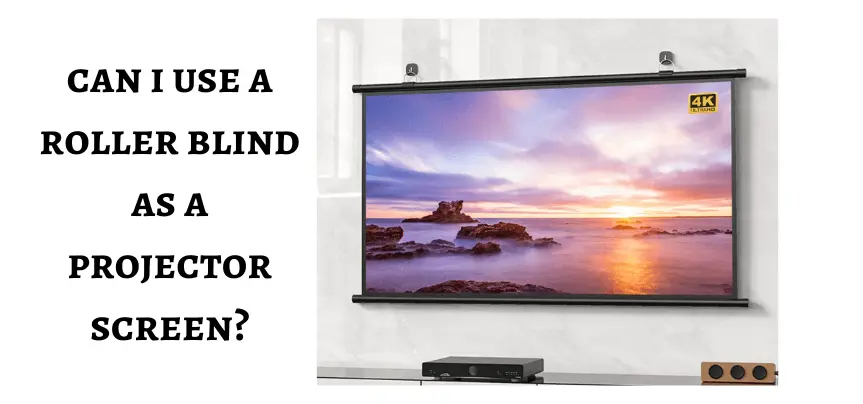
Can I Use a Roller Blind As a Projector Screen?
Yes, you can use a roller blind as a makeshift projector screen, but there are some important considerations to keep in mind:
1. Material
Roller blinds typically have a fabric material, and the quality of the material can greatly affect the projection quality. For optimal results, choose a roller blind material that is smooth, white or light gray, and has a matte finish. Avoid materials with a glossy or reflective surface, as they can cause hotspotting and reflections.
2. Size
Make sure the roller blind is large enough to provide a suitable viewing area for your projector. The larger the roller blind, the larger the projected image can be. Measure the area where you plan to hang the roller blind and ensure it can accommodate the screen size you desire.
3. Mounting
Mount the roller blind securely to a wall or other suitable surface. It should be taut and free from wrinkles or folds to ensure a smooth projection surface.
4. Tension
Some roller blinds have a spring-loaded mechanism that can create tension in the fabric when extended. This tension can help maintain a flat and wrinkle-free surface for projection.
5. Lighting
Ensure that the room is adequately darkened when using a roller blind as a projector screen. Ambient light can significantly degrade image quality, so use curtains or blinds to block out external light sources.
6. Resolution
The quality of the projector you use will affect the image quality on the roller blind. Higher-resolution projectors will produce sharper images.
While using a roller blind as a projector screen is a budget-friendly option, it may not provide the same level of image quality and color accuracy as a dedicated projector screen designed for that purpose. If you’re looking for the best possible image quality, consider investing in a dedicated projector screen, but using a roller blind can work in a pinch or for casual use.
How Do I Mount a Roller Blind For Projection?
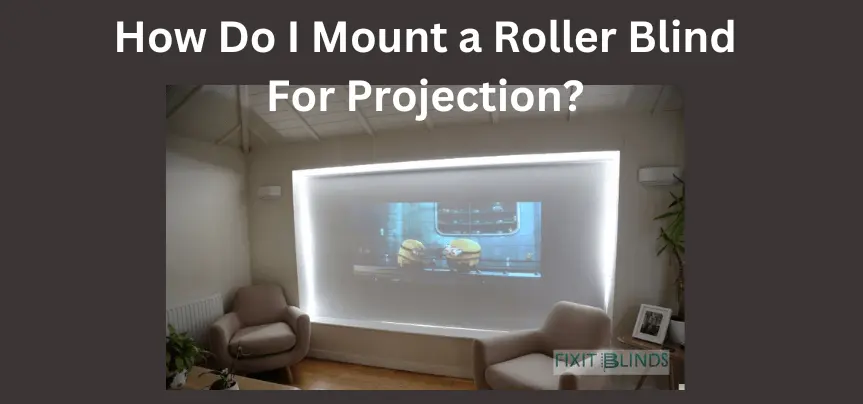
Mounting a roller blind for projection involves securing it to a wall or other suitable surface to create a flat and stable screen. Here are the steps to mount a roller blind for projection:
Materials You’ll Need
- Roller blind
- Mounting brackets or hooks (included with the roller blind or purchased separately)
- Screws and wall anchors (if not provided with the brackets)
- Level
- Screwdriver or drill
- Measuring tape
Steps
- Choose the Location: Decide where you want to mount the roller blind. Ensure it’s at an appropriate height and location for your projector and viewing area. Use a measuring tape to mark the desired height and position.
- Assemble the Brackets: If your roller blind came with mounting brackets, assemble them according to the manufacturer’s instructions. Ensure they are level when installed.
- Mark the Screw Holes: Hold the brackets against the wall at the desired location, aligning them with your markings. Use a pencil or marker to mark the positions of the screw holes on the wall.
- Pre-Drill Holes: Depending on your wall type (drywall, plaster, concrete, etc.), you may need to use wall anchors to provide extra support. Pre-drill holes at the marked positions, making sure they are the appropriate size for the anchors if needed.
- Install Wall Anchors: If you’re using wall anchors, insert them into the pre-drilled holes. Tap them gently with a hammer until they are flush with the wall surface.
- Attach Brackets: Align the brackets with the pre-drilled holes or wall anchors. Secure them to the wall using screws and a screwdriver or drill. Make sure the brackets are level and firmly attached to the wall.
- Mount the Roller Blind: Most roller blinds have a spring-loaded mechanism. Insert one end of the roller blind into the bracket on one side and then gently press or snap the other end into the bracket on the opposite side. Ensure the blind is taut and hangs straight.
- Test and Adjust: Roll down the blind and test its positioning. Adjust as needed to make sure it’s centered and level. Make any necessary adjustments to the brackets to achieve a flat and wrinkle-free surface.
- Secure the Blind: If your roller blind has any additional securing mechanisms (such as clips or locks) to keep it in place, use them to prevent it from rolling up unintentionally.
- Calibrate Your Projector: Once the roller blind is securely mounted, you may need to adjust your projector’s settings for optimal image quality, such as screen size and focus.
After following these steps, your roller blind should be securely mounted and ready to use as a projector screen. Ensure that the room is properly darkened, and you’re all set to enjoy your projected content.
What’s The Advantage Of Using a Roller Blind As a Projector Screen?
The primary advantage of using a roller blind as a projector screen is its cost-effectiveness. Here are some key benefits:
1. Affordability
Roller blinds are generally more budget-friendly compared to dedicated projector screens. If you’re on a tight budget or need a temporary solution, repurposing a roller blind can save you money.
2. Readily Available
Roller blinds are widely available in various sizes and materials, making them easy to find at home improvement stores, online retailers, or even in your own home if you have an unused one.
3. Space-Saving
Roller blinds can be rolled up when not in use, which is ideal for spaces where you don’t want a permanent projector screen taking up room. This feature makes them suitable for multi-purpose rooms.
4. Quick Setup
Installing a roller blind as a makeshift projector screen is relatively straightforward and can be done without professional assistance, saving you time and effort.
5. Customization
You can choose a roller blind material that suits your preferences in terms of color, texture, and size, allowing for some degree of customization to match your decor or setup.
6. Temporary Solution
If you need a screen for occasional use, such as movie nights or presentations, a roller blind can serve as a practical and economical solution.
While using a roller blind as a projector screen offers these advantages, it’s important to be aware of its limitations, including potential compromises in image quality and the need for suitable material selection. If you prioritize optimal image quality and plan to use a projector frequently, investing in a dedicated projector screen may be a better long-term solution.
What Size Of Roller Blind Should I Use For My Projector Setup?
The size of the roller blind you should use for your projector setup depends on several factors, including the size of your room, the throw distance of your projector, and your desired screen size. Here are the steps to determine the appropriate size:
1. Measure the Projector’s Throw Distance
First, determine the throw distance of your projector. This is the distance between the projector and the screen surface required to create a specific screen size. Refer to your projector’s manual or specifications for this information.
2. Determine the Desired Screen Size
Decide on the screen size you want for your projection setup. Common screen sizes for home theater setups are typically between 100 and 120 inches diagonally, but it can vary depending on your preferences and room size.
3. Calculate the Distance from the Projector to the Screen
Use the projector’s throw distance and your desired screen size to calculate the distance from the projector to the screen. This distance will determine where you should mount the roller blind. You can use the following formula:Distance from Projector to Screen = Throw Distance x Screen Size Factor
4. Screen Size Factor
This factor is determined by your projector’s specifications. For example, if your projector requires 1.5 times the screen width for a particular screen size, the factor would be 1.5.
5. Measure the Available Wall Space
Measure the wall where you plan to mount the roller blind. Ensure that it’s wide enough to accommodate the calculated distance from the projector to the screen.
6. Select a Roller Blind Size
Based on the available wall space, choose a roller blind size that fits within the calculated distance from the projector to the screen. Make sure the roller blind is large enough to display your desired screen size.
7. Consider Aspect Ratio
Pay attention to the aspect ratio of both your projector and the roller blind. Most projectors and content are in a 16:9 aspect ratio, which is the standard for widescreen content. Ensure your roller blind has a similar aspect ratio to match your projector’s capabilities.
8. Account for Mounting Space
Remember to account for the space required for mounting brackets or hooks for the roller blind. Measure the distance between the brackets and add this to your calculations.
9. Test and Adjust
After mounting the roller blind, test your projector setup to ensure it projects the desired screen size and is properly aligned within the available space.
It’s important to note that the specific calculations and measurements may vary depending on your projector’s specifications and the layout of your room. Always refer to your projector’s documentation for precise information regarding throw distance and screen size compatibility. Additionally, consider the viewing distance from the screen, as this can impact the overall viewing experience.
How Do I Ensure Proper Lighting Conditions When Using a Roller Blind As a Screen?
Ensuring proper lighting conditions when using a roller blind as a screen is crucial for achieving the best possible projection quality. Here are some steps to help you control and manage lighting in your projection space:
1. Choose a Darkened Room
Select a room with minimal natural and ambient light. Ideally, this should be a room with windows that have effective blackout curtains or blinds that can block out external light sources completely.
2. Install Light-Blocking Window Treatments
If your room has windows, invest in blackout curtains or blinds that can effectively block out external light. These window treatments are designed to prevent light from entering the room and can significantly improve the viewing experience.
3. Cover Any Light Leaks
Even with blackout curtains, there may be small gaps or light leaks around the edges of windows or doors. Use weather stripping, light-blocking tape, or draft stoppers to seal these gaps and prevent unwanted light from entering.
4. Turn Off or Dim Lights
Ensure that all room lights, including ceiling lights, lamps, and other sources of artificial light, are turned off or dimmed to their lowest settings. Consider using wall-mounted sconces with dimmer switches for minimal and controlled ambient lighting.
5. Use Ambient Lighting
If you prefer some ambient lighting during the viewing experience, consider installing soft, indirect lighting with warm-colored bulbs. This can provide a pleasant viewing atmosphere without compromising the projected image.
6. Control Light Reflection
Paint the walls of your projection room in dark, matte colors to reduce light reflection. Avoid glossy or reflective surfaces, as they can cause unwanted glare and reflections on the screen.
7. Light Control with Roller Blinds
If your roller blind is the type that allows some light to pass through, consider installing blackout fabric or material behind it. This will help block any light that may seep through the blind itself.
8. Light Control Outside the Room
If there are sources of external light that you can’t control, such as streetlights or neighbors’ lights, consider using blackout curtains or shades over any nearby windows or installing light-blocking window film to reduce light infiltration.
9. Calibrate Your Projector
Adjust the brightness, contrast, and color settings on your projector to optimize the image quality based on the room’s lighting conditions. Many projectors have preset modes for different lighting environments.
10. Experiment and Test
Before your actual projection event, test the setup in different lighting conditions to ensure you achieve the desired image quality. Make any necessary adjustments to the room’s lighting or the projector settings as needed.
By carefully managing and controlling the lighting conditions in your projection space, you can create an environment that enhances the viewing experience when using a roller blind as a screen. Remember that a darkened room with minimal light is key to achieving the best image quality.
Is Using a Roller Blind a Long-Term Solution For a Home Theater Setup?
Using a roller blind as a projector screen can be a viable solution for a home theater setup in certain situations, but it may not be the best long-term solution for everyone. Whether it’s suitable for your specific needs depends on various factors. Here are some considerations to help you determine if a roller blind is a suitable long-term solution for your home theater:
Advantages
- Cost-Effective: Roller blinds are generally more budget-friendly than dedicated projector screens. If you have budget constraints, a roller blind can be an economical choice.
- Space-Saving: Roller blinds can be rolled up when not in use, making them suitable for rooms where you need a multipurpose space.
- Customization: You can choose a roller blind material that matches your decor and preferences to some extent.
- Ease of Installation: Installing a roller blind is usually a straightforward DIY project, saving you installation costs.
Considerations
- Image Quality: Roller blinds may not provide the same level of image quality as dedicated projector screens. Screen material, texture, and reflectivity can impact brightness, color accuracy, and sharpness.
- Durability: Roller blinds may not be as durable as dedicated screens designed to withstand frequent use. Over time, they may show wear and tear.
- Limited Size Options: Roller blinds have size limitations, and achieving very large screen sizes can be challenging.
- Light Control: Controlling ambient light can be more challenging with roller blinds, potentially affecting image quality.
- Longevity: Roller blinds may need replacement or maintenance more frequently compared to dedicated screens.
Can I Use a Roller Blind Outdoors For Outdoor Movie Nights?
Yes, you can use a roller blind outdoors as a makeshift projector screen for outdoor movie nights, but there are some important considerations to keep in mind:
1. Material Selection
Choose a roller blind with a suitable material for outdoor use. Look for a fabric that is weather-resistant, mildew-resistant, and UV-resistant. Materials like outdoor canvas or vinyl are good options because they can withstand exposure to the elements.
2. Size
Ensure that the roller blind is large enough to provide a satisfying screen size for your outdoor movie setup. Consider the viewing distance from your audience and select an appropriate size accordingly.
3. Mounting
Securely mount the roller blind in your outdoor space. You may need to use strong hooks or brackets and anchor them firmly to a sturdy support structure like a wall, fence, or frame. Make sure the blind is taut and wrinkle-free when hung.
4. Weather Protection
While outdoor roller blinds are designed to withstand the elements, it’s still a good idea to take precautions. Roll up and store the blind indoors when not in use to protect it from prolonged exposure to rain, direct sunlight, or extreme weather conditions.
5. Wind Considerations
Wind can be a significant challenge for outdoor screens. Ensure that the roller blind is securely fastened and consider using additional weights or tie-downs to prevent it from flapping or moving in the wind.
6. Light Control
Outdoor settings can have varying levels of ambient light, even during nighttime events. Use outdoor lighting solutions strategically to create a pleasant viewing environment without interfering with the projected image.
7. Projection Equipment
Use a projector that is suitable for outdoor use and has sufficient brightness to combat ambient light and provide a clear image. Also, make sure to protect the projector from dust and moisture.
8. Audio
Outdoor environments can have different acoustics than indoor spaces. Consider investing in outdoor speakers or a portable sound system to enhance the audio experience.
9. Seating and Comfort
Set up comfortable seating arrangements for your audience, and provide blankets or cushions for added comfort during the movie.
10. Safety
Ensure the safety of your setup, including power cords, trip hazards, and any potential fire risks from equipment. Be mindful of fire safety when using lighting, electrical equipment, and extension cords outdoors.
11. Content Licensing
If you plan to show movies outdoors to a large group of people, be aware of copyright and licensing regulations. Some movies may require a public performance license for outdoor screenings.
Overall, with careful planning and the right equipment, you can create an enjoyable outdoor movie night experience using a roller blind as a projector screen. Just be prepared to take the necessary precautions to protect your equipment and ensure the safety and comfort of your audience.
What are the limitations of using a roller blind as a projector screen?

Using a roller blind as a projector screen can be a budget-friendly and space-saving solution, but it comes with certain limitations that you should be aware of:
1. Image Quality
Roller blinds may not provide the same level of image quality as dedicated projector screens. The material used in roller blinds may not offer the same color accuracy, brightness, and contrast as a specialized screen. This can result in slightly muted colors and less vibrant images.
2. Material Texture
The texture of roller blind material can affect the projected image. Some materials may have visible textures or patterns that can interfere with the sharpness and clarity of the projection. For optimal results, choose a smooth material.
3. Reflectivity
Roller blinds can have varying levels of reflectivity. Avoid materials with a glossy or reflective surface, as they can cause hotspotting and reflections, especially when ambient light is present.
4. Size Limitations
Roller blinds come in standard sizes, and achieving very large screen sizes can be challenging. If you require an extremely large screen for a home theater setup, a dedicated projector screen may be a better option.
5. Durability
Roller blinds are not designed for frequent rolling and unrolling. Over time, the constant rolling and unrolling can cause wear and tear on the blind material, potentially affecting its longevity and image quality.
6. Outdoor Use Challenges
While roller blinds can be used for outdoor movie nights, they are not inherently designed for outdoor use. Outdoor conditions like wind, rain, and temperature fluctuations can impact the blind’s durability and lifespan. Weatherproofing measures may be necessary.
7. Limited Installation Options
Roller blinds typically require wall mounting, which may not be suitable for all spaces. You may need to invest in additional hardware, such as brackets or hooks, for proper installation.
8. Lack of Fixed Frame
Roller blinds do not have a fixed frame like some dedicated screens. This means that the screen surface may not always be perfectly flat, which can result in slight distortions in the projected image.
9. Maintenance
Roller blinds may require regular cleaning and maintenance to keep the screen surface free from dust, wrinkles, or other imperfections that can affect image quality.
10. Long-Term Suitability
Roller blinds are often seen as a temporary or budget-friendly solution. If you’re looking for a long-term, high-quality home theater setup, investing in a dedicated projector screen is advisable.
In summary, using a roller blind as a projector screen can be a practical and cost-effective solution for certain situations, such as casual use or temporary setups. However, if you prioritize optimal image quality and durability, especially for long-term use, a dedicated projector screen designed for that purpose is a better choice.
FAQs
Will the image quality be as good as with a dedicated screen?
The image quality may not match that of a dedicated screen, especially in terms of color accuracy and brightness. However, it can be decent for casual use if you choose the right material.
Can I use a roller blind with any type of projector?
Roller blinds are compatible with most projectors, but ensure your projector’s specifications match your screen size.
Are there specific maintenance requirements for roller blinds used as screens?
Regularly inspect and clean the blind to maintain image quality and prevent damage.
Can I paint the roller blind material to improve image quality?
While it’s possible, it may not provide the desired results, and the material’s texture could affect paint adherence.
Is it possible to use a roller blind with an ultra-short-throw projector?
Yes, but you may need to position the projector differently to achieve the desired screen size.
Can I use a roller blind for 3D projection?
Yes, but ensure that the material’s texture doesn’t interfere with the 3D effect, as it might with polarized glasses.
Final Verdict
In the end, the answer to whether you I use a roller blind as a projector screen is a resounding “yes.” But it comes with a caveat: while roller blinds can certainly get the job done, they may not deliver the absolute pinnacle of projection quality. For casual users and those seeking a practical, affordable, and space-efficient solution, roller blinds are a worthy consideration.
However, if you’re aiming for a long-term, high-fidelity home theater experience, investing in a dedicated projector screen remains the gold standard. The journey to finding the perfect screen for your projector setup may involve experimenting, adjusting, and understanding your unique requirements.
Whether it’s a roller blind or a specialized screen, the key is to create a viewing experience that brings your content to life and immerses you in a world of visuals, whether for entertainment or information sharing. Ultimately, the decision is yours, guided by your needs and aspirations for the perfect projection setup.
