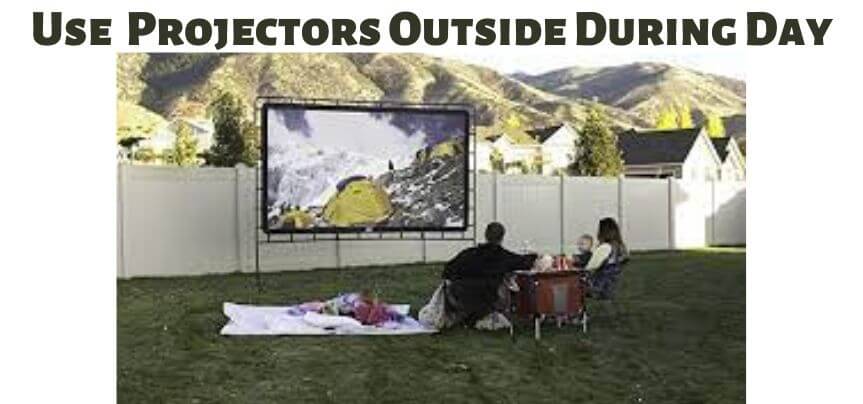
Do you need to project a presentation outdoors or in a room with natural daylight streaming in? If so, you may be wondering about how to use a projector outside during the day. Well, one of the great things about having a projector in your home is that you can use it to project images anywhere in the house.
But does it have to be dark to use a projector? Well, it does not have to be like this always. Luckily, there are several steps you can take to ensure that your presentation is still visible, no matter what time of day it is.
In this blog post, we will explore the basics of how to use a projector outside, look at some techniques for enhancing image quality on the daytime projector screen, and provide tips to optimize your projector. By the end of this post, you should know if it is possible to use a projector in daylight and how you can get the best image quality.
Can You Use a Projector In Daylight?
Projectors have been around for a long time, and their use has varied depending on the user’s needs. In the past, projectors were used primarily in businesses and classrooms, where they were used to display information on a screen or wall.
Projectors have come a long way since then, and they are now available for use in a variety of settings. One of the most common questions that people have about them, is whether or not can you use projectors in daylight. The answer to this question is yes, you can use a projector in daylight.
However, there are a few things that you need to take into consideration before using a projector in daylight.
1. Type Of Projector
The first thing that you need to consider is the type of projector that you are using. Will you need an outdoor projector or a daylight projector?
Well, here are two primary types of projectors: DLP and LCD:
- DLP projectors use a type of technology that is not affected by light, so they can be used in any type of lighting conditions.
- LCD projectors, on the other hand, use a type of technology that is sensitive to light. If you are using an LCD projector, you will need to find a way to block the sunlight from hitting the projector screen.
One way to do this is to use a diffuser. Another method that can be used to block the sunlight from an LCD projector is to use a shadow box.
2. Projector Lumens
After you have chosen the right projector for your need you have to consider how many lumens it is offering. If you plan on using a daylight projector then you should consider a high-lumen projector.
3. Location
Another thing you need to consider is the location. You’ll want to find a spot that is relatively flat and free of any obstructions like trees or bushes. If you’re setting up on grass, make sure to use something to level out the surface. A table or a piece of plywood will do the trick.
4. Projector Screen
The next thing to think about is the screen. You can buy a portable screen specifically for outdoor use, or you can improvise with a sheet or a bedsheet hung between two trees or on a clothesline. If you go the improvised route, make sure the sheet is wrinkle-free so the picture isn’t distorted.
5. Temperature
The last consideration is temperature. Projectors are sensitive to heat, so if it is a particularly warm day, you may need to provide additional ventilation or cooling for the projector. You can do this by using a fan or by setting the projector on a table or surface that is not in direct sunlight.
Latest Posts:
Best Projectors For Sports
Best Projectors For Wedding Receptions
Best Projectors For Ceiling Mounts
Best Projectors For Projection Mapping
Best Projectors For Halloween Effects
Best Projectors For Cookie Decorating
Best Projectors For Church
Best Projectors For Camping
How To Use a Projector Outside During The Day?
Are you looking for a way to project images in your home or office? Perhaps you’re looking to create a presentation or watch a movie at night. Whatever your reason, using a projector is an easy and affordable way to get the job done.
When it comes to projecting images outdoors, there are a few key things to keep in mind for daytime projector use:
- First and foremost, make sure that you are using the correct settings for the projector.
- Second, adjust the brightness and contrast to get the best picture possible.
- Third, select the right location and surfaces to project on – both indoors and outdoors.
- Fourth, use specialized screens or materials to further define the projection.
- Fifth, consider using multiple projectors for a more powerful image presentation.
- Sixth, use anti-reflection films to reduce glare and preserve image quality in high-traffic areas.
- Seventh, and finally, utilize high contrast projectors with wide viewing angles to capture outdoor audiences.
With these tips in mind, you’ll be able to create a great picture no matter where you’re projecting!
1. Choose The Right Projector
First and foremost, choose the right outdoor projector for your needs. Make sure that the model that you choose is compatible with your specific environment. For instance, if you’re looking to use a projector in a windy area, make sure that the projector has a sturdy mount and wind protection features.
You don’t need the best projector for outdoor daytime viewing, just a projector that will fulfill your needs while used in the daytime.
2. Mount The Projector Correctly
Once you’ve chosen your projector and determined its compatibility with your environment, it’s time to position it and mount it correctly. Be sure to position it so that it’s facing toward where you want the images projected and ensure that its mount is stable.
3. Know The Throw Ratio Of The Projector
Additionally, make sure that the projector has a specified throw ratio (the distance from the screen to the projector).
Note: For more information about throw ratio, click on the articles below:
This will help determine how far away from the screen your images will be projected.
4. Choose The Right Projection Surface
When choosing a projection surface, it’s important to think about both visual aesthetics and practicality.
For example, some surfaces are designed specifically for projecting images while others can double as tables or desks when used outdoors in bright light conditions.
Be sure to test out different surfaces before setting on one. Sometimes trying out several options until you find what works best for your presentation style.
5. Adjust The Brightness
Once you’ve selected your projector and have set up adequate space, it’s time to adjust brightness settings so that the image is crisp and clear. Depending on the type of image being displayed (text vs images), different brightness levels will be necessary.
It’s also important to take into account how bright sunlight will be when displaying an image indoors. Adjusting brightness settings accordingly can help keep viewers’ eyes comfortable during long presentations.
You may also like the following articles:
Best Projector For Daytime Use
Best Long Throw Projector For Distance
Best Short Throw Projector For Golf Simulator
Best 1080p Projectors Under 500 Dollars
Best Projector Under $200
Best Projector Under $300
How Do I Make My Projector Brighter In Daylight?
It can be quite annoying trying to watch a movie or give a presentation when the sun is streaming in through the windows. The natural light makes it difficult to see the image on the screen, and it can be a real pain trying to adjust the projector to compensate.
So, how to make a cheap projector brighter in daylight?
1. Choose a Screen Of Reflective And Less Light-Absorbing Material
One is to use a screen with a high level of reflectivity. Screen materials such as white vinyl and natural fiber offer good reflectivity, as do specialty screens designed for use in high ambient light conditions.
The downside of using a highly reflective screen is that it can produce more glare, which can be just as problematic as a washout. To avoid this, you also have to ensure that it has a low level of light absorption.
2. Use a Projector Screen With a Built-in Light Source
Another option for dealing with daylight conditions is to use a screen with a built-in light source. These screens use either LEDs or cold cathode fluorescent lamps (CCFLs) to illuminate the screen from behind, providing a bright, evenly lit image that is visible even in direct sunlight.
The tradeoff for the increased brightness is that these screens can be more expensive than traditional screens.
3. Choose a Projector With Higher Lumens
You may want to consider using a projector with a higher lumens rating. Lumens measure the light output of a projector. The higher the lumens the brighter the projector.
4. Increase Projector Brightness
Another option is to increase the brightness of the projector itself. This can be done by changing the settings in the menu or by using a remote control. By increasing the brightness, you will be able to see the projection more clearly.
To understand what is the best brightness for a projector you have to experiment and test a bit before the real show!
5. Adjust Projector Angel
Finally, you can try to adjust the angle of the projector so that the light is not shining directly into your eyes. This will take some trial and error to get right, but it can help to improve the visibility of the projection.
All of these tips will help to make your projector brighter in daylight so that you can see the projection more clearly. Try out a few of them and see which one works best for you.
Check these article also for more interesting information:
Best Mini Projector For Netflix
Best Mini Projector For MacBook Air
Best Projector For Dorm Room
Best Cheap Projector For PowerPoint Presentations
Best Projector For a Bright Room
Best Projectors Under $50
How Many Lumens Do You Need To Watch In Daylight?
In short, the answer to the question “How many lumens do you need to watch in daylight?” is quite simple – you need more than 1000 lumens to watch comfortably in daylight.
So does a 2500-lumen projector will be enough or do you need a 3000-lumens projector? Well, the lumen output of a projector is not the only factor that determines its daytime watch ability.
To get the most out of your projector in daytime conditions, it is important to take into account the other important specs such as static contrast ratio, throw ratio, and image size.
In this article, we will break down each of these specs and explain how they impact an outdoor projector’s daytime watch ability.
How To Choose The Right Lumens? 4-Tips Only!
- The lumen output of a projector is the most important factor in determining its daytime watch ability.
- A projector with a higher lumen output will be able to produce a brighter image, which will be easier to see in daylight conditions.
- Most projectors on the market today have a lumen output of at least 2000, which is more than enough to produce a bright image in most cases.
- However, if you are using your projector in a particularly bright room or in direct sunlight, you may want to consider a model with an even higher lumen output.
What else you should consider besides lumens for a clear bright picture?
1. Contrast Ratio
In addition to lumen output, the static contrast ratio of a projector is also important to consider. The static contrast ratio is a measure of the difference between the darkest and lightest areas of an image.
A higher static contrast ratio will result in a more defined image with more visible details. When watching a projector in daylight conditions, a high static contrast ratio is especially important because it will help the image to stand out against the bright background.
2. Throw Ratio
The throw ratio of a projector is another important spec to consider. The throw ratio is the ratio of the distance between the projector
Can Indoor Projectors Be Used Outside?
Indoor projectors are a great way to create a home theater experience, but what about using them outdoors? Can indoor projectors be used outside?
Indoor projectors designed for use indoors have limitations when used outside due to the powerful ambient light present in most outdoor settings. However, with a little ingenuity and knowing how to adjust certain settings, you can still use them outdoors.
Here’s what you need to consider before considering to get the best projector for outdoor daytime use;
1. Projector’s Capability To Work In Direct Sunlight
First and foremost, understand the intensity of direct sunlight and its effect on a projector. Certain projectors are designed to work in bright sunlight while others are not as strong and may require supplemental lighting.
2. Outside Environment
Additionally, consider how your outdoor environment will affect your projector setup. For example, if you have a pool or other water feature nearby, be sure to choose a projector that is designed for outdoor use.
If your environment is relatively mild, you may be able to use a regular projector without any additional precautions. However, if your area experiences extreme weather conditions (high temperatures or rainfall), it is important to consider purchasing a projector that is weather-proofed or has an outdoor cooling system.
3. Consider Setting Up a Projector At The Right Place
Another consideration when setting up your projector is where it will be placed. Ideally, projectors should be placed close enough to an area with strong light but far enough away from windows or other sources of ambient light so that viewers won’t experience eye strain or other negative effects from too much brightness.
You can also adjust the projection distance by moving the projector closer or farther away from the screen. However, note that this will affect image quality, so make sure that you are prepared for this before making any adjustments!
Why Is My Projector Dark Outside During The Day?
Have you ever noticed that your projector is extremely dark while trying to watch a movie outside during the day? And wondered why is my projector dim. Well chances are, the issue is caused by glare.
Glare is a major problem when it comes to projectors and can cause images to appear dark and washed out. There are several reasons why projectors have difficulty with outside lighting, and each of these factors can contribute to increased glare.
How To Avoid Glare On a Daytime Projector Screen?
1. Minimize Sunlight
To start, sunlight is one of the main sources of projector glare. This is because sunlight reflects off of nearby surfaces and projects onto the screen as bright light. Reflective surfaces such as windows also contribute to increased projector glare, as do ambient light levels around the room.
To minimize or avoid this problem, it’s important to use screens that are designed for outside environments and mount your projector high up so that it’s out of reach of reflections from surrounding surfaces.
2. Reduce Brightness
Reducing projectors’ brightness also helps reduce projector glare. This is because brighter images tend to scatter more light than darker images, which reduces projection noise and improves visibility onscreen.
It’s also helpful to use appropriate projection surfaces – something that you’ll want to take into account when choosing a projector for your home or office environment.
3. Other Reasons Why Your Projector Is Dark Outside
Another factor that affects image quality is the distance from the projector screen. The further away you are from the projector screen, the lower the resolution will be.
This is why it’s important to position your outdoor projector as close as possible to where you want it to display content. The environment is another factor if it’s too much hot outside using a reflective and less absorbing screen.
Also, there could be certain obstructions nearby, so place the projection unit at least two feet away from any nearby obstructions like trees or walls.
How Do I Make My Screen More Visible In The Sun?
Watching movies and presentations in the sun can be a challenge, especially when you’re using a projector. The sun’s glare can make it difficult to see the images on the screen.
Fortunately, there are a few tips and tricks that you can use to make your daytime projector screen more visible in the sun.
1. Choosing The Right Projector Screen
Projector screens are an important part of any projector setup, and choosing the right one is key to getting the most out of your device. When selecting a screen, you need to make sure that it’s bright enough to see clearly in bright environments and that it won’t affect your image quality.
There are several factors to consider when selecting a screen, including the type of coating it has, how reflective it is, and its size.
2. Choose The Right Screen Size
First and foremost, be sure to choose the right size for your needs. Many people mistakenly purchase a large screen when they need a small one.
Larger screens can cause obstructions in front of your projector lens that can reduce image quality and visibility. Instead, choose a screen that’s about twice as wide as it is tall so that there’s plenty of room for both the projector and your content.
3. Consider Screen Coating Or Material
In addition to its physical size, another important factor to consider when picking out a projector screen is its coating.
There are three main types of coatings:
- metallic (which reflects light),
- plastic (which absorbs light), and
- fabric (which reflects some light).
Each type has its advantages and disadvantages:
- Metallic coatings are usually the brightest but also have the highest price tag.
- Plastic coatings are less expensive but tend to be less reflective than other types.
- Fabric coatings tend to be the least expensive but also have lower reflectivity levels than other types.
Finally, one factor that isn’t typically considered when buying projector screens is whether or not they’re laminated. Some users find laminated screens more legible in bright conditions because they.
4. Additional Tips To Improve Visibility In The Sun
- First, use a higher-lumen projector to increase the brightness of the image.
- Second, invest in a sun-reflective film to reduce glare. This will help you see even in direct sunlight.
- Third, ensure clear sightlines by placing the projector facing away from the sun.
- Fourth, move the projector further away from the audience to increase brightness.
- Fifth, make sure the temperature of your projector’s bulb is controlled; too hot and you’ll create heat damage; too cold and you won’t be able to see clearly.
- Sixth and finally, adjust and optimize your image contrast settings to improve visibility.
- Last but not least, position yourself and the audience in the shade if possible.
With these simple tips, you’ll be able to enjoy an enjoyable outdoor projection show without any problems!
In a Nutshell
Projectors can provide a great outdoor viewing experience, whether it’s for a movie night or a presentation. However, there are important considerations to make before setting up your projector outdoors.
From choosing the right outdoor projector to setting up your projection surface correctly, you must follow the right steps. In this article, we have outlined some basic yet essential steps that you can follow to get the best results from your outdoor projector setup.
With the right knowledge and preparation, you can easily enjoy movies and presentations outside. We hope you found this blog post useful. Come again if you have more questions or quarriers regarding your projector.
