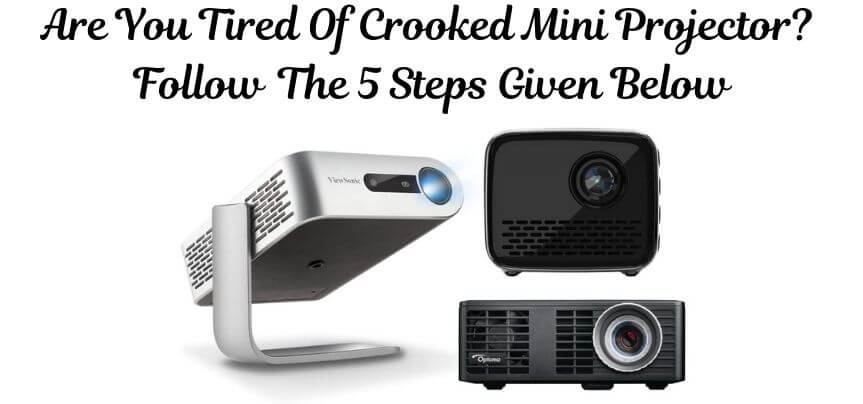
It is very convenient to watch a movie on a mini projector at home, but you might also sometimes face issues with adjusting the picture on the screen. Well, we understand this situation and we know why you are exactly here. You might be seeing a crooked image on your projector’s screen. And you might be worried that why does my mini projector look crooked?
Moreover, the image might be appearing uneven on the screen, tilted, blurred on the sides, or bent downwards or upwards on the screen. You might be experiencing any one of these issues as it is quite common to come across any of these problems because after all just like humans, machines are also not always perfect. But you need not worry about how to solve the problem of a crooked image on your mini projector.
In this article, we are going to share a few techniques and tips that will help you fix this problem.
Why Does My Mini Projector Look Crooked?
Aligning your projector with the screen can sometimes become a quite challenging task. It might take you some time before starting with your task to adjust the projector’s image on the screen. You might notice that at the center of the screen the image is perfect but on the sides the picture is blurry or it is unevenly divided on the projector’s screen.
No matter how hard you try to make both your screen and projector align with each other it never works out. There are various tricks and methods to fix this problem. Most of the time you can just use the projector’s settings and controls to make the image appear evenly and more focused on the screen.
To avoid the double image of the mini projector, try moving the mount of the projector to adjust it at the right angle to the screen. If these options don’t work then you can try using the keystone correction or the lens shift.
We have listed down all the possible solutions below so you can get to understand them more properly.
1. Angle Adjustment
No matter how well you have adjusted or mounted your projector if it is not at the correct angle with the screen you will continue to face issues such as that crooked images.
You can use the following techniques to adjust the angle of your projector;
- If you are using an average mini projector the one that is not mounted on the ceiling then try adjusting the angle by using the projector’s feet.
- If you have your mini projector mounted on the ceiling then you have to look for the adjustments at the projector’s joint.
- In case there’s no setting option on the joint then you can try the other techniques, which are mentioned ahead in this article.
2. Use Lens Shift To Adjust The Angle Of Your Mini Projector
In case your projector has a lens shift control option then there is no need for you to move the whole projector to adjust the angle. The lens shift control allows you to move the position of the lens which in turn will modify the image on the screen. You can check your mini projector’s manual to see how the lens shift control works.
3. Use Automatic Keystone Correction To Adjust The Image On The Screen
While lens shift allows you to straighten the side corners keystone correction feature enables you to adjust the bottoms of your projector’s image on the screen. Keystone control is a digital panel that allows you to modify the angle of the projector image on the screen. All you have to do is to press the buttons accordingly until you see a perfect image in a rectangle shape on the screen.
4. Use The Zoom Feature Of Your Mini Projector
If the image still does not fit on the rectangular screen and is irregular then you must use the zoom function of your mini projector to make it even from all the sides of the screen.
5. Iteration Adjustments
The zoom option on the projector might only fix the image at the right and left side corners. So, to fix the image at the bottom and top you will need to use iteration.
Why Is My Mini Projector Not a Perfect Rectangle?
If the image is not appearing in the shape of a perfect rectangle on your screen, then we assume that your mini projector’s image is tilted either towards the left or right side of the screen. In both cases, we called this situation a trapezoid of the image. And to correct it you need to try projector trapezoid correction.
Below we have mentioned a few ways how you can achieve a perfect rectangular-shaped image on the screen;
1. Adjust Your Mini Project Against The Center Of The Screen
You will need to move your mini projector a little toward the center of the screen such that it is aligned exactly at the mid of the screen. This will allow the image to fall evenly on the screen and make a perfect rectangle.
2. Use Your Mini Projector’s Feet And Keystone Controls
Adjust your mini projector with the help of the feet of the projector to move it at an angle where it is aligned at the center of the screen. If your projector does not have feet then use keystone correction which is a digital control panel that allows you to adjust the angle of the projector to the screen.
3. Use The Screen Fit Button On Your Mini Projector
You can also use your mini projector’s settings option i.e., the screen fit button to adjust the image on the screen.
4. Use The Quick Corner Setting Of Your Projector
The quick corner setting will allow you to fix the image by moving it from the top, bottom, or from the sides to the center in such a way that the image becomes rectangular.
Latest Posts:
Best Projectors For Church
Best Projectors For Sports
Best Projectors For Wedding Receptions
Best Projectors For Projection Mapping
Best Projectors For Halloween Effects
Best Projectors For Cookie Decorating
Best Projectors For Camping
Why Is My Mini Projector Bigger On One Side?
Now if your projector’s image appears to be bigger on one side the position or the angle of your mini projector has a lot to do with it.
Let’s see how it can be fixed;
1. Projector’s Adjustment
If you are frequently experiencing the issue of image size bigger on one side that means your mini projector is placed at the wrong place or you might have not gotten its mounts on the ceiling. To solve the issue instantly mount your mini projector at the right spot to the screen on your room’s ceiling.
2. Screen Size
Chances are you might be using the wrong screen size which might be causing the problem. You need to choose the right-sized screen before using it with your mini projector.
Use the zoom control ring to adjust the screen size of the mini projector. The image might be automatically zoomed in or otherwise. To fix the issue use the zoom control rings to make the picture appear even on the screen.
Why Is My Mini Projector Picture Slanted?
If your mini projector is not placed at a proper angle towards the screen then the images will get distorted. This will possibly make your projector one side slanted on the screen.
To understand why is your projector screen slanted and how can you fix it consider the following points;
1. Adjust The Position Or Angle Of Your Mini Projector
This would be a game-changer for your picture result on the screen. You have to make sure that your mini projector is placed in front or at the center of the screen to get perfect results.
2. Use The Lens Shift Feature Of Your Mini Projector
Now the majority of the mini projectors have this feature which allows you to move or adjust the lens of your mini projector. So, with the help of the lens shift feature, you can modify the image on the screen without even moving your mini projector.
You may also like the following articles:
Best Projector For Daytime Use
Best Long Throw Projector For Distance
Best Short Throw Projector For Golf Simulator
Best 1080p Projectors Under 500 Dollars
Best Projector Under $200
Best Projector Under $300
Why Is My Mini Projector Image Not Square?
If you are wondering why is your projector image not square and before you stress yourself out. Let us tell you that it’s not a unique situation and is quite common. Yes! That means you can yourself solve this issue within a few minutes.
Let’s see how that can be possible;
- Make sure that your mini projector is mounted right at the front of the screen.
- Adjust the angle of the projector and make it align with the center of the screen.
- Use keystone correction controls to make the image square.
- You can also use the lens shift option to make the projector fit the screen properly.
- Use the zoom and iteration control to fit the image on the screen.
Why Are My Mini Projector Pictures Uneven?
There might be many reasons why the images are appearing uneven on your mini projector’s screen. Your projector’s adjustment, the texture of the screen, and settings have a lot to do with it. If you are frequently observing uneven images on your screen then all you need to do is to learn how to straighten projector images.
- You have to make sure that the texture of the screen is smooth and not bumpy. Because if it’s unsmooth the picture quality will become distorted and the images might appear uneven on the screen.
- Next, make sure that you have mounted or placed your mini projector at the right spot in your room.
- If your projector is mounted perfectly then you can use the lens shift option to adjust the image alignment on the screen.
- You can also use keystone correction but we will prefer you to not use the manual one, rather always go for the automatic keystone correction option.
- You can use the settings of your mini projector such as zoom correction, screen fit, or projector’s feet to fix the image on the screen.
Check these article also for more interesting information:
Best Mini Projector For Netflix
Best Mini Projector For MacBook Air
Best Projector For Dorm Room
Best Cheap Projector For PowerPoint Presentations
Best Projector For a Bright Room
Best Projectors Under $50
How Do I Fix a Lopsided Mini Projector?
When images on the screen are not symmetrical or are tilted or slanted towards one side, we call such images lopsided. This is a normal situation as it might have happened at least one time with all the projector users.
Let’s see, how can you fix a lopsided mini projector?
1. Move The Projector Left Or Right Towards The Screen And Use The Lens Shift Feature
You can move your mini projector to the left or right to see if the image is balanced if not then after moving the projector use the lens shift option to adjust the lens towards the center of the screen.
2. Mount Or Adjust Your Mini Projector Perpendicularly To The Screen
Make sure that your projector is mounted or placed perpendicular to the screen or wall. If not, you have to adjust it perpendicularly so images can be focused on the screen. This can also be applied to the mini projector looking dark on one side.
3. Check The Keystone Controls
There might be some changes in the settings or your keystone correction controls might be set to neutral which will make the right side of the mini projector a little closer to the screen as compared to the left side. If this is the case then you can adjust it by positing the mini projector towards the center of the screen.
How Do I Fix a Skewed Mini Projector Image?
If your images are appearing skewed on the screen chances are that there might be some changes with the key stoning of your mini projector.
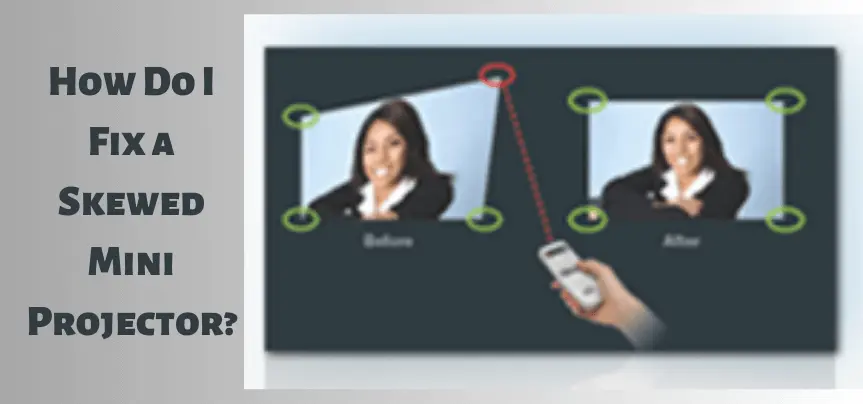
Try the following techniques to fix the problem;
- To fix the keystone effect first you need to make sure that your projector is placed properly against the screen.
- Try moving your mini projector toward the left or right or tilt it a bit upward to make it align with the screen.
- You can also move the mini projector only counterclockwise for the image to make a perfect square.
- Manually adjust the lens by using the lens shift feature of your mini projector.
- Many mini projectors now come with a digital keystone correction option if your mini projector has such an option use it this will automatically make your images fit the screen.
How Do I Invert The Image On a Mini Projector?
Images appearing upside down on the screen is also one of the common issues you might face while using a mini projector.
To invert or flip the images on your mini projector you can try the following techniques;
- You can flip the images on your mini projector with the help of your projector’s display menu.
- You will see the menu button option on either your projector’s remote control or at the front of your mini projector.
- Once you have located the menu buttons choose the extended menu option by pressing the down arrow.
- From the down arrow navigate for the projection option.
- Move the arrow towards the option you want to choose such as front/ceiling or rear/ceiling to make the images invert on the screen.
- Keep on pressing the ‘Esc’ option until the menu options are closed.
Bottom Line
Mini projectors are quite convenient to use and give you the wow factor of a big screen for watching movies or your favorite shows at home. But there will be many times when you will face a few issues with your mini projector. Your images might be crooked, they will be slanted or skewed, or they will become uneven on the screen. But there is no need to think that you are stuck and only technical help can save you. Many methods will help you save your day on your own without any help. This article shared a few meaningful trips and tricks. We hope you have found them to be useful.
For more such informative blogs regarding projectors please visit us more often. Have a fabulous day!

I in addition to my pals have already been going through the good secrets and techniques on the website then all of the sudden I had an awful suspicion I had not thanked you for those techniques. All of the boys appeared to be certainly stimulated to learn them and have now simply been loving them. Thanks for getting simply helpful as well as for pick out this sort of fantastic tips most people are really needing to be informed on. My sincere regret for not expressing appreciation to you earlier.
There are certainly loads of details like that to take into consideration. That may be a nice level to bring up. I offer the ideas above as normal inspiration but clearly there are questions like the one you bring up the place an important thing can be working in trustworthy good faith. I don?t know if finest practices have emerged around issues like that, but I’m sure that your job is clearly recognized as a fair game. Each boys and girls feel the impression of only a moments pleasure, for the rest of their lives.
I in addition to my buddies have been reading through the excellent points on your web page and so all of the sudden got an awful suspicion I had not thanked the blog owner for those secrets. My young boys are already stimulated to read through them and already have surely been having fun with those things. We appreciate you simply being really kind and also for finding this sort of good things millions of individuals are really eager to be aware of. Our own honest apologies for not saying thanks to you sooner.
I in addition to my buddies came studying the great things on your website and so all of the sudden developed a horrible feeling I never thanked the site owner for those strategies. All of the women became so thrilled to read through them and have in effect without a doubt been taking advantage of those things. Appreciation for being indeed considerate and for considering some tremendous subjects millions of individuals are really eager to understand about. Our own sincere regret for not saying thanks to you earlier.
Thanks for all of the hard work on this web site. Gloria really likes carrying out investigation and it’s simple to grasp why. My partner and i notice all concerning the dynamic tactic you offer simple tricks via your web blog and as well encourage response from the others on this concern while our favorite simple princess is undoubtedly being taught so much. Take pleasure in the rest of the new year. You’re the one doing a tremendous job.